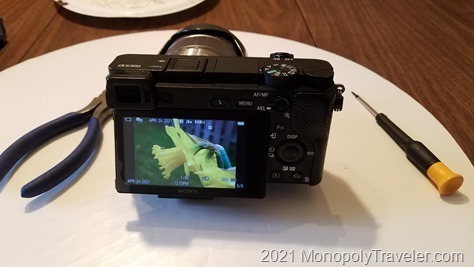
After our family Spring Break road trip, where our camera stopped working, I thought it had taken it’s last picture. Doing a little research I found that the most likely issue was my shutter no longer worked correctly causing the camera to stop working. To have it fixed would most likely be expensive and rumors had Sony releasing a new camera with some better features sometime in the next few months. That money was probably better spent on a new camera instead of fixing the current one.
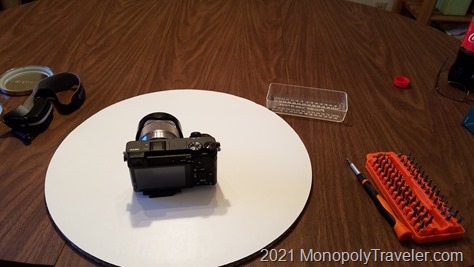
One Saturday morning I decided to tear apart my Sony a6300 camera, since there was nothing to lose, and see if there was something blocking the shutter from opening or closing. Maybe it would be fairly obvious and the camera would be back in business.
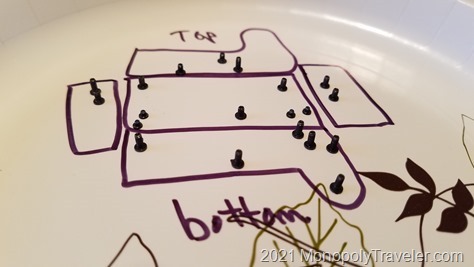
I started by gathering the tools needed and dishes to put screws and parts in to keep all of the pieces in. I’ve taken the back off of this camera a number of times previously trying to fix a sticky shutter button so I had some experience with how to get this far. To keep the screws straight I used a paper plate with sides and drew a diagram of the camera and location for each screw. While I know most of them and which screw goes where, a few are easily switched with all of the pieces that need to be disassembled so better to be a little more detailed.
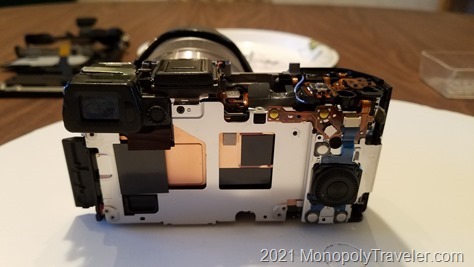
Soon the back of the case was removed along with the top. Now it was time to dig in further. Slowly and methodically removing each screw and eventually each cable, I also photographed each layer with my phone before taking it off. That way I had a reference if there was something unfamiliar as I put it back together. It’s amazing how many electronic components there are packed so tightly into this camera body. Eventually I removed the sensor and arrived at the shutter. The shutter is at the front of the camera but you have to get to it from the back which requires taking off everything behind it. This is quite a lengthy and slow process. Examining and testing the shutter I couldn’t find anything keeping it from working. Still I moved the shutter open and shut several times looking over each piece. Without really finding anything I re-assembled the camera and tried it. Still giving me an error message and not working. This whole process took about 4 hours and no improvements.
Later in the day I researched parts for the camera and found them available at Encompass.com. While reassembling the camera earlier I tore one of the ribbon cables so now needed to add that to the list of parts. Finding what I needed it would be a couple of hundred dollars for these. Was I willing to chance it and try a repair risking that I may end up taking it into a facility or buying a new camera?
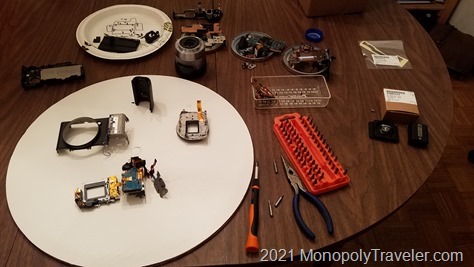
Deciding to move forward I ordered the parts. They would be at my house in a couple of weeks. I actually receivd them later that same week ahead of expectations. I began to tear apart the camera completely Friday night. This time I had it completely into pieces as I wanted to replace a piece of the front case which had been damaged during one of the times my camera fell as it crashed from the seat of my car to the floor on more than one occasion as I had to slam on the breaks for one reason or another. Carefully removing each piece before calling it a day. I was ready to put it all back together the next morning. Saturday morning I began reassembling with the replacement parts. While doing this I cleaned the pieces, especially the sensor since I now had great access to it. A few hours later it was time to see if all this work would pay off.
Now for the moment of truth. Putting the battery in and turning it on. No response. A little disappointed I once again began to remove screws and search for issues. A ribbon cable was not connected. Fixing that I put it back together and tried it again. Still nothing. Getting into it again I found a different piece not quite lined up correctly. Once again I put it together. Putting the battery in I turned it on and it came back to life but I couldn’t see anything on the screen, only in the view finder. Shutting it off I re-checked the connections for the screen, taking them apart and putting them back together and tried it again. This time it all came to life requiring set up as if it was new. Excited and relieved I adjusted settings and inserted a memory card heading outside to test it. The photo below shows the first photo I took which you can see at the top of this article. I was exhilarated that the camera once again worked. All in all it took more than 8 hours for this repair. Over the next few weeks I discovered my flash still doesn’t work but I don’t use that often enough to justify the risk of breaking something else to take apart the camera to fix it. For now it lives again and I’m ecstatic.
I don’t recommend doing this unless you’re willing to risk the camera never working again or taking it into an authorized repair shop. Knowing the risks, I decided to continue, being fully prepared to buy a new camera if it didn’t work. I probably will buy a new camera in the near future anyway but that has nothing to do with this one working. It has more to do with how much I use it and abuse it each year.

